Thursday, May 24, 2012

Tasty Morsels - May Menu

Sorry that I'm just now posting this, but here you have all the items that I'm offering this month and part of the next.  I'll be doing a new menu come mid June, so please keep checking back to see what I have in store :-)


Tasty Morsels
May 2012 Menu


Blueberry Crumb Bars - $3 each, 2/$5 or 6/$12

Carrot Cake w/Walnuts – 8 inch loaf $6, mini loaves $3 each, 2/$5 or 6/$12
(cream cheese frosting also available 8 oz for $4)

Cinnamon Rolls w/cream cheese frosting $4 each, 2/$7 or 6/$13
(can be made with nuts, chocolate chips and/or raisins for an extra $1 per item)

Lemon Poke Cake – 8 inch loaf $7, mini loaves $3 each, 2/$5 or 6/$12

Light and Lovely Bread - 8 inch loaf perfect on its own, toasted and buttered or for French toast 1 for $4, 2/$6

Peanut butter chocolate marble brownies $3 a square, 2/$5 or a whole 8 x 8 pan for $12

Pear Crisp – 8 x 8 pan (about 8 squares) $12

Strawberry cake w/fresh local strawberries $12 – 9 inch round cake, sliced or whole

SRL (Squash, Rosemary and Lemon) Bread $7 - 8 inch loaf


To place an order call 707 3560 or leave me a message. Please try to place orders at least 1 week in advance of when you will be picking up.

Orders of $30 and over CAN be delivered for free if address is within 15 minutes of my home address (using the map app on my iphone).

All items can be made sugar free. Working on gluten and dairy free menu, so please keep checking back :-)

Items from previous month's menus are available upon request.

Sunday, September 18, 2011

"Burger and Shake" Redux: the quicker, healthier way to get satisfied

Let me introduce you to a few of my new favorite instant meal time freezer staples: MorningStar Farms Mushroom Lover's Burger and Italian Herb Chik Patties.  Now, I know what you're thinking: "This gal's done lost her marbles!  She's gone to the green side!" No sir, I ain't no tree huggin' grass eater.  Just a mama with three unreasonably picky, growing kids and an (equally picky) handsome husband who needs has deemed healthy eating codependent with good eating.

  As afore mentioned, I'm a serial grocery shopper.  Some women are drawn to department stores and shoe boutiques, but my retail weaknesses are Save Mart and Grocery Outlet.  If you've got food, I'm coming to buy it and I want it C-H-E-A-P.  So it goes without saying that when I find stuff like veggie burgers on clearance at more than 50 off the sticker price, I'm filling my cart, and subsequently my freezer/fridge/pantry, like it's nobody's business.

  So, starving after the latest big box raid, I pile into the house with a screaming baby and a yappy 3 year old (the usual...) and a car full of stuff.  Unload, put baby in swing to sing her happy little nappy off, and think "What can I quickly prepare to eat that will fill me up but won't make me feel like a mega-mama??"  A quick perusal of the back of a box of MorningStar Burger patties allows that I can have warm fare in 2.5 minutes.  Toasting a frozen burger bun (always got at least an eight-pack in the ice chest) will take that up to 6 minutes.  Slapping on some A1, Grey Poupon, spinach and tomatoes brings the microwave-to-table total to 10 minutes for what might be a fantastic meal.  So I say, HECK YES I'm going give this a shot.  here's what I did...


Ingredients for The Best Veggie Burger I've Ever Had 

~~Microwave-to-table in 10 minutes or less~~

1 sesame seed bun
2 MorningStar Mushroom Lover's Burger patties
1 - 2 slices pepper Jack or favorite cheese
1 tbsp A1 (approximately, or enough for a thin smear across the bottom bun)
1 tsp Grey Poupon or your favorite mustard)
a bunch of baby spinach or your favorite leafy green
2 slices of tomato (garden fresh is best, Feng shui says!)
S & P (go light on or nix the S as the burgers are plenty well seasoned)

A plate (duh!)

Directions:

Toast bun to desired doneness (or just leave it alone, au naturale).  Place MorningStars on microwaveable plate and nuke 1 minute, flip and nuke for another minute.  Place cheese en center mass and heat until melted, about 30 seconds*

Prepare the bun, mustard on one side, A1 on the other.  Pile the greens onto the bottom bun, then the sliced tomato, season with S & P and double up those beautiful steaming hot mushroom patties.  Top, press down slightly, put your butt back and your head over your plate and mow that burger down!

*This all depends on your microwave.  You know what yours is like, so work accordingly.

Of course all of this burger talk begs the presence of a rich, creamy, ice-cold shake.  The kind that can only be produced from a pint of ice cream, a few chunks of ice and a gallon of milk... until now!  This is what I call the Emerald Shake and even though it tastes like you're drinking a jug of straight whipping cream, your hips will have only gained the happiness of staying in those skinny jeans you love so much.

<3 Emerald Smoothie <3 


1 ripe Hass avocado
5 chunks of ice
1/4 c 2% milk
2 packets of Splenda or 1 tsp regular white sugar
splash of lime juice if you've got it (keeps the avocado from browning)

Split the avocado open and spoon the flesh into your blender.  top with rest of ingredients, lid up and buzz until velvety smooth.  Serve with a straw in your favorite smoothie glass along side your new favorite veggie burger.  Ah, can you find a meal like this at In n Out??  I think not!  Enjoy!

If you're not full convinced that swapping a veggie burger for an all beef patty, check this out:

1 MorningStar Mushroom Lover's patty = 
Fat: 6 g
Calories: 110

1 Emerald Smoothie = 
1 medium Hass avocado: 50 calories and 4.5 grams of fat
1/4 c 2% milk: 30 calories and 1.2 grams of fat
2 packets of Splenda: 20 calories total
Total: 100 calories and 5.7 grams of fat

I added all the bells and whistles to my burger because that's how I'm used to preparing them, but really the MorningStars would be GREAT as the main protein portion of a meat-and-two-veg kind of meal.  And who can say no to a creamy smoothie?  I know I get weak in the knees just thinking of them.  Get FULL (not fat) and happy! :-)

Monday, July 25, 2011

Summertime Sorbet = YUM TIME!

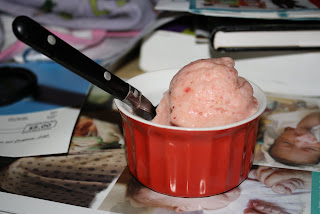
First scoop of homemade sorbet was GOOD! 

A lot of people in my neck of the woods find themselves buried in fruit come Summer time.  Strawberries from March through the middle of June, peaches from late June through August and lemons as the weather cools off at the tail end of August.  We are truly blessed to have such a bountiful supply of fresh produce and don't get me wrong, I appreciate not having to pay high prices for good food.  But you can only can and pie so many fruits before your family (and friends) begin to look away when you enter the room (*whisper whisper* "She's bringing another cobbler!").

Fresh sorbet!

  One thing at least my oldest son and I can agree on is that smoothies are good ANYTIME of the year, as many times a week as my blender can handle.  Our favorite combo is 60-70% strawberries and 30% other fruit (and vegetable when I can sneak it past him).  Even more so, we agree that sorbet is the bomb-diggity, especially when the clock ticks 9pm and it's still 95 degrees out.  Finding myself with an abundance of swiftly-ripening peaches, I turned to the internet for a good recipe I could throw into my little blue ice cream maker and up popped this jewel.  When I'm not fruiting it up, I'm an avid baker so I always have at least five pounds of sugar tucked away in my baking supply shop (the pantry) and if you like sorbet, so should you.  Now all you need is ripe fruit and shazam!  It's SORBET TIME!

Pretty flecks of REAL strawberry and peach amid ripe bananas

Lastly, the best fruit for any preparation is the kind that smells of what it is.  I spend a lot of my time sniffing through the fruit section at my supermarket, huffing strawberry fumes and pineapple exhaust.  If it don't smell good, it ain't gonna taste good neither!


Gotta have a little help when you make sorbet, donchaknaw?


~ The Recipe ~

Adapted from Curtis Aiken's Peach Sorbet found on Food Network (http://www.foodnetwork.com/recipes/curtis-aikens/peach-sorbet-recipe/index.html) because I only like to make what I'm going to use (even simple syrup).

Ingredients:

1 c roughly chopped strawberries, frozen*
1 c roughly chopped ripe peaches, frozen
1 large ripe banana, roughly chopped or broken into chunks
1 c sugar (or half a cup of Splenda)
1 c water
Splash of juice (I used orange, but whatever you've got on hand is good)

Place half of each fruit into jug of a blender.  Bring water and sugar to a boil in a small saucepan; cook for about 5 minutes until all sugar is disolved and has thickened slightly.  Pour hot syrup over frozen fruit, cover and blend until pureed.  Add rest of fruit and splash of juice and blend until the consistency of a smoothie (add just enough juice to break down and loosen fruit).  Scoop a bit off the top and try; should taste a little too sweet and won't run off spoon.**  Freeze in ice cream maker according to manufacturer instructions (mine took about 10 minutes and actually got so thick the mixer stopped).  Remove to air tight container and freeze for at least 1 hour or until scooping consistency.  

* Freezing the fruit, instead of using fresh, helps this sorbet come together quickly, allowing for less time spent waiting for the final product.  Eating is the objective here, isn't it? :-)
** Tastes buds become slightly desensitized when eating cold foods, so making your soft mix "too sweet" will give it a better mouth feel and flavor when you go to eat it.

Serving suggestions: Straight up, scooped into a pretty bowl with a spoon on the ready.  Or if you're feeling breakfasty, try a sorbet mimosa: 1 champagne flute, your favorite bubbly and a scoop or two of this sorbet.  This idea is making my mouth water! :-)

p.s.  I've just enjoyed my first scoop and I've gotta say i really like it.  It's like an uber thick smoothie; there's still quite a bit of texture because I didn't blend it down all the way (which I prefer).  After about an hour and a half, the mix was still soft, so I took a fork and whipped it up a bit, to incorporate the frozen outer layer with the still gooey center.  Will try a scoop in an hour or so and let you know how that goes.

Saturday, July 23, 2011

Pandan coconut waffles

This is a recipe for my friend Maggie, who also lives in a city that does not have these readily available to the masses at the local Grand Century/Asian strip mall (although her neck of the woods is a bit more dense in the Asian population) :

Adapted from an entry on Typology Central ( http://www.typologycentral.com/forums/home-garden-cooking/22639-i-m-drooling-right-now-pandan-coconut-waffles-recipe-inside.html 
)

This is a very simple yet satisfying recipe for Pandan Coconut Waffles. There are a few variations that you can adjust once you get the gist of it. I have a very picky eater in the house so he approves this one. So here it is, enjoy!

You can get pandan flavour in a bottle at any asian grocery store such as H-mart or Hong Kong market etc..

2 cup cake flour (you can use all purpose flour, but not self rising)
9-10 TBSP sugar (can vary depending on your sweet tooth)
1/2 TSP salt
2 TSP baking powder
3 eggs (separating the yolk and the egg white)
1 whole can coconut milk
1 stick of unsalted butter (melted)
1/2 TSP pandan flavoring
Butter spray to keep the waffles from sticking to the maker, even though it may say non-stick, don't take the risk of having to scrub later...

Directions

Turn on your waffle maker so it'll be hot and ready!

Dry Ingredients
Mix the cake flour or all purpose flour in a bowl along with salt, sugar and baking powder. Stir it evenly, if you're using cake flour, which is extra fine, you don't need sifting. Set aside

Wet Ingredients
Mix the 3 egg yolks in a bowl with 1 can coconut milk, melted butter and panda flavoring. Stir evenly and set aside.

Either using an electric hand mixer or bring out your fancy KitchenAid mixer, using the whisk, beat the egg white on Med/High until it turns into a white stiff consistency, almost like whipped cream. Do not over beat. This is what will make the waffle very light and airy  Set Aside

Now, with the dry ingredient bowl, slowly add the wet ingredient in and stir gently with a spatula. Once the wet is completely mixed in, slowly add the egg white by folding it gently. DO NOT STIR at this point, you just want to fold it in by pushing the spatula to the very bottom of the bowl and push up then fold over until all the egg whites are folded in.

Now it's ready for the waffle maker. I'm sure you can handle it from here.

Wednesday, July 20, 2011

Challah at yo' baker! Finally, a good, light loaf of egg bread

I'm sure I did this wrong, but here's my attempt at a six strand braid.  Looked like it worked... kind of.  


There's something about a fresh, fluffy, hot loaf of home made bread that makes me want to get up and dance.  Even more so, I LOVE the process: blooming the yeast, shaping the dough, watching said dough transform from pale and smooth to golden and glossy.  I'll admit, it's a long process that takes time and patience, but if you're into baking in any capacity, you won't regret putting forth just a little more effort than usual.  Faintly sweet, light, airy and everything anyone would want from a loaf of good ol' egg bread, this challah (or challot, if you decide to make more than one!) will find your hot little hand raiding the bread box for the very last crumb.

More good news about this bread?  It's just as fantastic 2, 3 and 4 days after baking as it is fresh out of the hot box.  It's moist, but not dense.  Chewy, but not tough.  I just luuuuurrve it!


Warning to all bubbes and challah purists: this recipe is adapted from a Jewish cookbook and, as such, was written to make a traditional loaf.  I prefer a flakey/tender crust, so I used melted butter instead of an egg wash.  Also, I don't braid my challot, I roll it around, form it into a loaf and slap it into a couple of greased loaf pans.  To each his own, I say!  If you know you like something a certain way, be your own chef/baker.  With that said, here we go!

Adapted from "Jewish Home Cooking" by Arthur Schwartz

Ingredients:

2 1/4 tsp active dry yeast (Gold Star brand from Smart and Final is cheap and fantastic)
1 c warm water - no more than 110 F
1/3 c granulated sugar
4 1/2 - 6 c all purpose flour
3 large eggs, lightly beaten
1/4 c canola oil
2 tsp salt
3 tbsp butter, melted

My tool box (again, to each his own...):

Kitchenaid stand mixer, fitted with dough hook
1 c glass liquid measuring cup
1/4 - 1 c dry measuring cups
1/4-1 tbsp measuring spoons
Rubber/silicone spatula
Dough scraper (silicone) - aides greatly in gathering all of the dough from the sides of the work bowl
Flimsy paper plates (the cheaper, the better)
Silicone baking mat (like a Silpat)
MOST importantly: muh clean and nimble little hands!

In the bowl of a stand mixer, combine yeast and water; stir to combine.  Add sugar, stir to combine, then add 1/2 cup of flour.  Mix again.

Stir in eggs until well incorporated then stir in one more cup of flour until moistened through.  On medium-low speed, beat in the oil and salt.

Beat one cup of flour in at a time until dough starts to pull away from sides of work bowl but is still very sticky, should take an additional 2-3 cups of flour at this point.  At this point, it's all about feeling: if the dough is too wet, it'll stick all of your hands when you try to remove it from the bowl.  Beat in 1/2 c additional flour until the dough starts to climb up the dough hook and pulls completely away from the bowl.

Remove every last bit of dough from the work bowl, form into a rough ball and dip into extra flour.  On a lightly dusted work surface (I lined my tile counter with an extra large silicone baking mat), knead the dough until it springs back at you if you poke it, no less than 10 minutes (this goes a lot quicker than you think, so work it!).  Pull dough over itself until a smooth ball is formed and place in your biggest well oiled bowl.  Cover tightly with plastic wrap and allow to rest in your fridge for at least 3 hours, at best over night.*  Dough should be double, if not triple its original size.

After the dough's done taking a nap and is still ice cold**, you can either split it evenly into 3 balls, roll them into snakes and throw them into a standard braid, or you could be lazy like me and split the dough in two and slap it into well greased glass loaf pans.  Either way, let the shaped dough rest, loosely covered with a clean dish towel, at room temperature for  at least 40 minutes.  Some where close to the middle of this time, set your oven for 350 F.

When dough has doubled its size, it's fully risen and ready to go.  Bake for 20 minutes, rotate all exposed surfaces with foil and bake additional 20 minutes or until you get a hollow sound when the top of the loaf is tapped.  De-pan and enjoy immediately with a pat of butter or skip the formalities and rip into that loaf like you've never had bread before!!  Enjoy!!

*If you are in a hurry, you can allow the dough to do this first rise in a warm, draft free place (my garage is plenty warm enough during the summer months) for about an hour or so.  The cold rise allows the glutens you've developed via kneading to super relax, which will in turn produce a SUPER airy and light inside and crisp flakey crust.
**I found that the dough kept its shape and was easier to work with when formed straight out of the fridge.
Tuesday, June 28, 2011

Chocolate Stout Cake


The original chocolate stout cake donut served on Father's Day, 2011

I originally made this cake as a way to use at least part of a bottle of chocolate bock my husband had deemed unpalatable.  As a lover of all things vanilla, he felt it was "just too chocolatey".  The plan was to serve it after a scrumptious lunch at Farmer Boys on Father's Day, which worked out quite nicely as a rich back drop to our greasy spoon affair.  Between this and the lemon yogurt cake I made for my dear old husband, we each savored the sweetness of each other's company until the last crumb was devoured.

Although the chocolate bock lent a nice flavor, I much prefer the smooth, almost coffee like taste of Guinness, but really you can use what ever dark stout beer you like.  This is a simple cake to prepare which can be decorated however you please, but is best enrobed in melted semi-sweet or dark chocolate just to make sure people know what flavor is boss.  Serve this up with a shot of espresso and maybe a dollop of freshly whipped cream and you've got a dessert that'll make the biggest chocolate fan sing!

A fantastic start to a gorgeous cake!

Chocolate Stout Cake
Adapted from Tracey's Culinary Adventure, who adapted it from Bon Apetit

Aaaaah... the good stuff!

Chocolate Stout Cake
adapted from the Barrington Brewery in Great Barrington, MA via Bon Appetit (via Smitten Kitchen)

1/2 cup stout (I used Guinness) 
1/2 cup (1 stick) unsalted butter
1/4 cup plus 2 tablespoons Dutch-process cocoa powder

1 tbsp granulated coffee*


Stout, coffee and a stick o' butter = YUMMERINO!

Whisking everything together

1 cup all-purpose flour
1 cup sugar
3/4 teaspoons baking soda
3/8 teaspoon salt
1 large egg
1/3 cup sour cream**
3 ounces semisweet chocolate
1 tsp vegetable oil


To make the cake: Preheat oven to 350 F.  Spray a round spring-form pan well with cooking spray and dust with flour.***

In a large saucepan set over medium heat, combine the stout and the butter.  Stirring occasionally, bring the mixture to a simmer.  Remove the pan from the heat and whisk in the cocoa powder and coffee granules until the mixture is smooth.  Set aside to cool slightly.

Meanwhile, in a large bowl whisk the flour, sugar, baking soda and salt together.  In the bowl of a stand mixer fitted with the paddle attachment, beat the egg and sour cream until well blended.  Add the slightly cooled stout mixture to the bowl and beat to combine.  Add the flour mixture all at once and beat briefly on low speed to begin to incorporate.  Remove the mixer bowl and use a rubber spatula to fold the batter to finish incorporating the dry ingredients.

Transfer the batter to the prepared spring-form pan.  Bake for 30-32 minutes, rotating pan 180 degrees at the 15 minute mark for even baking.  Center of cake should spring back when gently pressed.     Transfer the pan to a wire rack and allow to cool for 10 minutes then turn the cake out of the pan and set it on the wire rack to cool completely. 


Microwave semi-sweet chocolate in a glass measuring cup for about 30 seconds increments (each microwave is different so set the time and stay close by) until most of the way melted through.  With a smooth, mix in oil until well incorporated into chocolate and forms a smooth glaze.  Immediately pour over cooled chocolate sponge, allowing excess to pour over from edge to edge.  For a garnish, zest an orange over the ganache and sprinkle some coffee granules over the center.  Serves 8.  


Velveteen chocolate stout batter


This bad boy is ready to load into the magical hot box! 

*Decaffeinated coffee granules are great for those of you who are sensitive to caffeine
** I used mayonnaise instead because that's what I had on hand.  Could not taste the difference.  


*** The best way to do this is to dump about a cup of flour into the greased pan, shake, roll and wiggle the pan until all surfaces are covered, then invert the pan over the flour container and tap out the excess powder.  

Monday, June 27, 2011

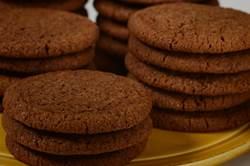
Ginger snaps: a spicy snappy sugar cookie

This is going out to one of my followers who is a BIG fan of these tasty morsels.  
Gingersnap Cookies
In the bowl of your electric mixer (or with a hand mixer), beat the butter and sugars until light and fluffy (about 2 - 3 minutes). Add the molasses, egg, and vanilla extract and beat until incorporated. In a separate bowl whisk together the flour, baking soda, salt, and spices. Add to the butter mixture and mix until well combined. Cover and chill the batter for about 30 minutes or until firm. 

Preheat the oven to 350 degrees F (180 degrees C). Line two baking sheets with parchment paper.

Place about 1 cup (200 grams) of white granulated sugar in a medium sized bowl. When the dough has chilled sufficiently, roll into 1 inch (2.5 cm) balls. Then roll the balls of dough into the sugar, coating them thoroughly. Place on the baking sheet, spacing about 2 inches (5 cm) apart and, with the bottom of a glass, flatten the cookies slightly. 

Bake for about 12 - 15 minutes or until the cookies feel dry and firm on top.  (The longer the cookies bake, the more crisp they will be.) Cool on a wire rack. 

Makes about 4 dozen cookies.


Gingersnap Cookies:

3/4 cup (170 grams) unsalted butter, room temperature*
1/2 cup (105 grams) dark brown sugar
1/2 cup (100 grams) white granulated sugar
1/4 cup (60 ml) unsulphured molasses
1 large egg
1/2 teaspoon pure vanilla extract
2 cups (260 grams) all purpose flour
1/2 teaspoon baking soda
1/4 teaspoon salt
1 1/2 teaspoons ground cinnamon
2 teaspoons ground ginger
1/2 teaspoon ground cloves
Garnish:
1 cup (200 grams) granulated white sugar

*If using salted butter, do not add extra 1/4 tsp of salt mentioned later in ingredient list.